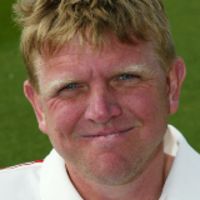
Peter Martin
INTL CAREER: 1995 - 1998
Most Viewed Players
Browse Other Players
New Zealand
All
 Michael Bracewell
- Mark Chapman
- Devon Conway
- Jacob Duffy
- Zak Foulkes
- Matt Henry
- Kyle Jamieson
- Daryl Mitchell
- Rachin Ravindra
- Mitchell Santner
Alphabetically sorted top ten of players who have played the most matches across formats in the last 12 months
Peter Martin
Jamie Cox is aghast as Peter Martin traps him lbw for 1 at the start of the Somerset second innings••Paul McGregor/ESPNcricinfo Ltd
Peter Martin bowling against the backdrop of the Blackpool deckchairs••Paul McGregor/ESPNcricinfo Ltd
Peter Martin ; bowling portrait 2001••Paul McGregor/ESPNcricinfo Ltd
Peter Martin getting some pre season practice in••John Dawson/Photo by John Dawson
Peter Martin appeals successfully for LBW against Mark Butcher••John Dawson/Photo by John Dawson
Peter Martin celebrates the dismissal of Mark Lathwell••John Dawson/Photo by John Dawson
Peter Martin back in action••John Dawson/Photo by John Dawson
Peter Martin celebrates after capturing the wicket of Matthew Walker••John Dawson/Photo by John Dawson
Peter Martin traps Richard Key LBW••John Dawson/Photo by John Dawson
Martin showing his disappointment as Alleyne edges the ball to the fence••John Dawson/Photo by John Dawson
Peter Martin traps Rob Turner lbw for 8••Paul McGregor/ESPNcricinfo Ltd
Peter Martin is pleased enough to get the wicket of Ward for 7••Paul McGregor/ESPNcricinfo Ltd
Peter Martin bowling from the Pavilion End••Paul McGregor/ESPNcricinfo Ltd
Peter Martin bowling for Lancs in the 2000 Benson and Hedges competition••John Dawson/Photo by John Dawson
Peter Martin celebrates getting out Burns••John Dawson/Photo by John Dawson
Peter Martin sends Mark Lathwell's stump flying••John Dawson/Photo by John Dawson
Peter Martin broke his left thumb only a week after returning from a broken right thumb••John Dawson/Photo by John Dawson
Peter Martin celebrates trapping McCague LBW••John Dawson/Photo by John Dawson
Peter Martin celebrates his return after injury with a wicket••John Dawson/Photo by John Dawson